
Building responsive Linux mobile apps with libhandy 1.0 and Gtk3
November 2020: This tutorial is being updated to reflect the minor API and configuration changes in libhandy 1.0, which is the upcoming version. Thanks to Martin Chang (@marty188586) for the tips
For those interested in using C instead of Python as programming language, developer Nilanshu Rajmane has ported our "Organizer" demo app to C and libhandy 1.0 as programming language. You can find the C code in this repository.
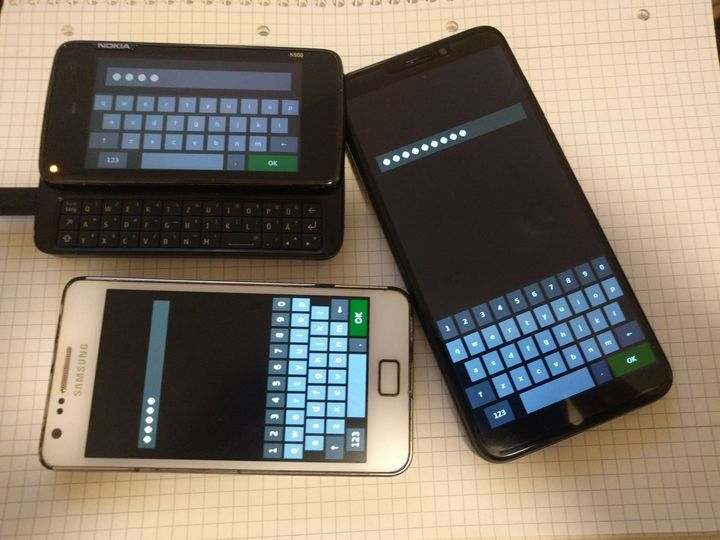
With the delivery of the first, developer-oriented Librem 5 and PinePhone prototypes to the bravest backers, we can now officially state that modern Linux smartphones are a thing. But, as we know, a smartphone without proper apps is basically a wide-screen dumb-phone, and a Linux phone without proper touch-friendly and responsive apps is far from usable in daily life.
The aim of this tutorial is to guide you towards building simple apps (in this example, a simple To-Do and Pomodoro timer app) for Linux smartphones using Gtk3 and libhandy, a library developed by Purism (and used by several official GNOME projects) to extend Gtk by providing mobile-friendly widgets and make the creation of responsive apps easier. Basic knowledge with programming and (WYSIWYG) UI design tools is highly recommended to understand the steps fully. The source code for the demo project is now available on GitLab for download and reference.
Although these tutorials are made on Ubuntu and use Python 3 as programming language for purely practical reasons, they can easily be adapted to other distributions (by installing a couple of packages in some different way) and programming languages, as the meson build tool is relatively language-agnostic and most Gtk function names and overall logic work (more or less) the same way in all languages, making them easy to follow and adapt.
Step 0: Installing Flatpak
You will need to setup Flatpak and add the Flathub remote in order for this app to have the correct Flatpak runtimes/SDKs and to be packaged properly. Just follow the instructions from this page on your Ubuntu box and you will have Flatpak within seconds, plus the time of rebooting your machine. And yes, rebooting in this case is (still) truly necessary.
Step 1: Setting up the build environment
Installing libhandy
To install libhandy on Ubuntu 19.10 (or later), you can simply get it from the official repositories:
$ sudo apt install libhandy-1-0 libhandy-1-dev
On other distributions, you can either look for it in their repositories (or AUR) or build it from source. Please notice that this step is optional, but still recommended as it will enable libhandy widgets in the UI design tool, standalone compilation outside Flatpak and more.
Installing GNOME Builder
We are going to use the official GNOME Builder IDE for our application. You can get it easily from Ubuntu repositories:
$ sudo apt install gnome-builder
On any other Flatpak-enabled distribution, installing it is not any more difficult:
$ flatpak install flathub org.gnome.Builder
Step 2: Creating a new project in Builder
Thankfully Builder offers ready-made "Hello World" templates for basic Gtk applications using Meson and Ninja as build tools, eliminating some of the hassle with setting up the build environment from scratch.
Launch GNOME Builder and click on the "Start New Project" button on the bottom of the welcome screen. You will now have to choose a name for your project, in our case simply "Organizer". The application ID will have to (somewhat) follow a reverse-domain scheme, so for example com.yourwebsite.AppName, io.github.username.AppName or com.gitlab.username.AppName are commonly found patterns. In our case, com.tuxphones.Organizer will work.
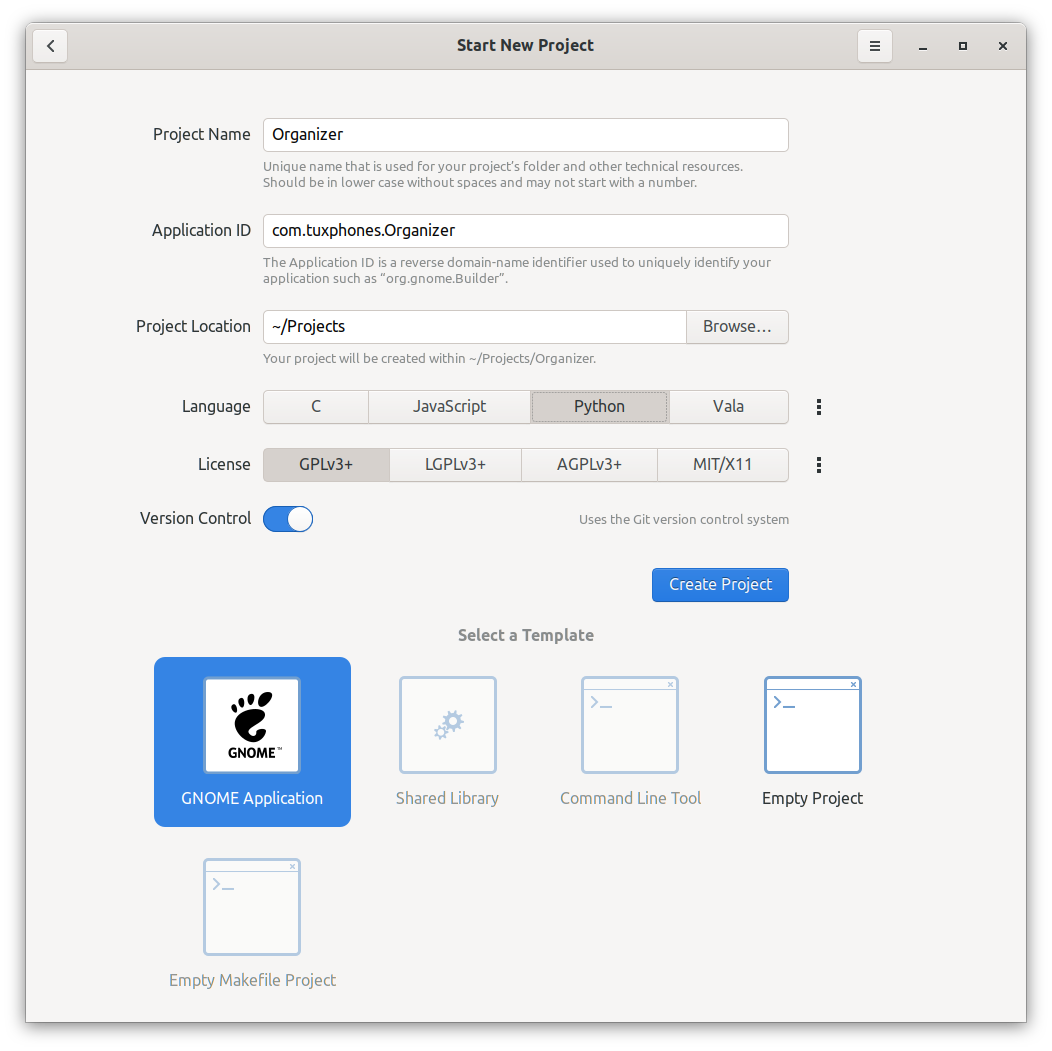
We choose Python as this will be the language for the app, and "GNOME Application" as template. Version Control is not mandatory, but still highly recommended.
Now we can finally click on Create Project, et voilà, the IDE will create and open our "Hello World" Gtk template.
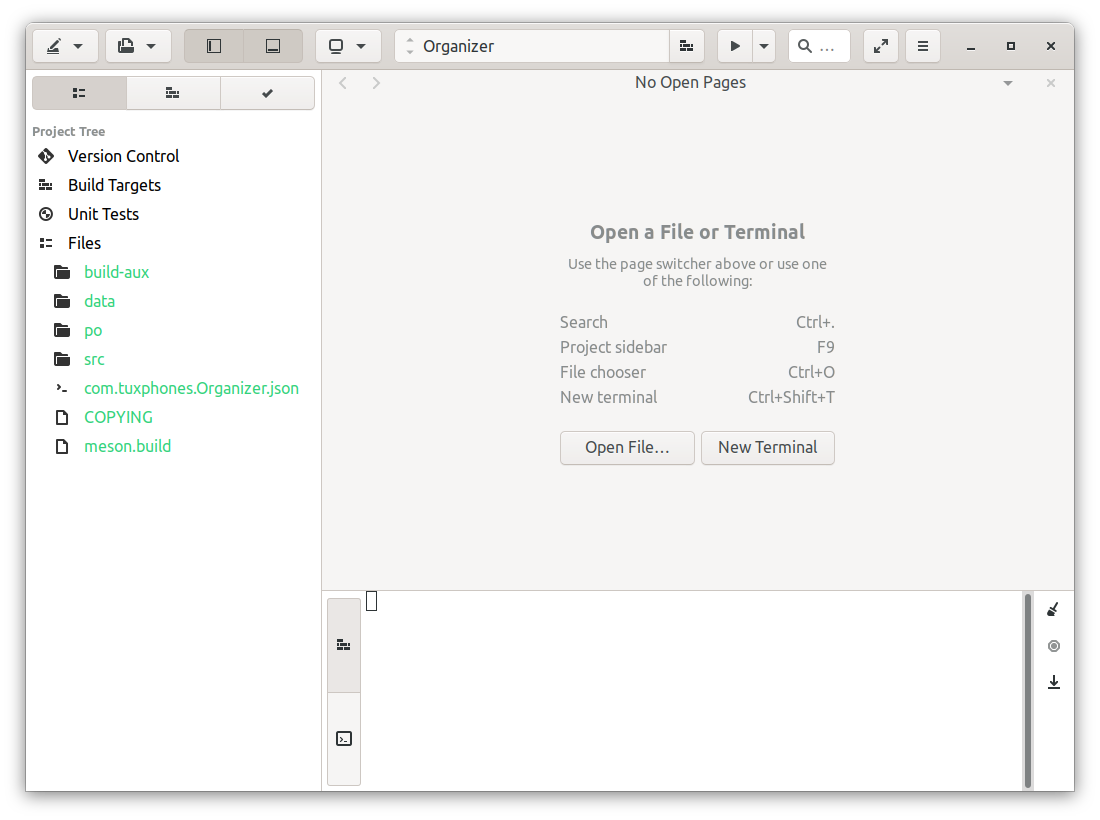
The sidebar shows our Project Tree, which we can briefly explain as follows:
- build-aux: auxiliary directory, we won't touch it for this project
- data: all kinds of data files for our app, such as manifests and other static files we'll need to access at runtime, or copy when installing the app
- po: internationalization and translation related files, beyond this tutorial
- src: Python code (and in this case .ui layout files) for our app
- com.tuxphones.Organizer.json: the Flatpak manifest file for our project, containing information and needed dependencies for our project
- meson.build: the base Meson build file for this project. Every directory that is involved in compiling and installing should have one.
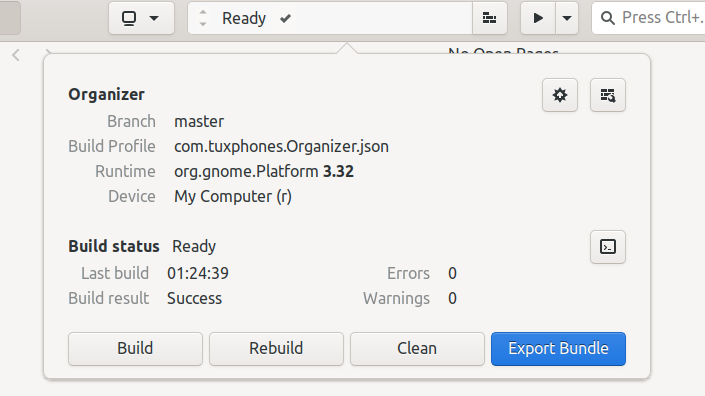
Click the central item in Builder's title bar (the one that says Organizer) to get more information on the project's build status.
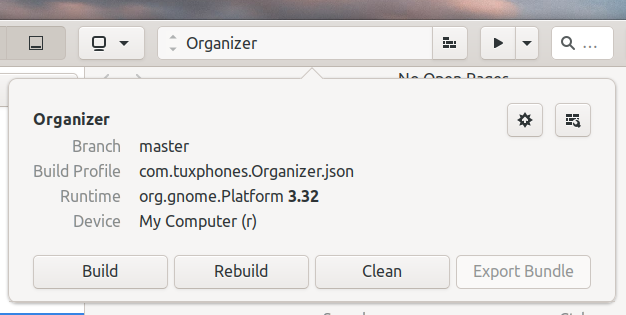
Now click the "update dependencies" button (the leftmost of the two icon-only ones in the build status popover) to download any needed dependencies for the project (and install any required GNOME SDKs and platforms if prompted).
Now you are ready to test your "Hello World" app, still without libhandy support. Click Build (or the brick button in the title bar) and then the "play" icon to run the project.
After some seconds (or minutes, if several dependencies need to be installed), if everything works, you should see your "Hello World" window on the screen.

Step 3: Adding libhandy to our app
Now that we have a plain Gtk app, it's time to add libhandy support to it in order to start designing the UI. Therefore we need to add the libhandy dependency to both the Flatpak manifest file and the Meson build files. The latter isn't strictly mandatory in this case, as the dependency will be always packaged with the app if we include it in the Flatpak manifest, but it warns users if not installed at compile time and prevents run-time errors if the project is built stand-alone.
So we open the Flatpak manifest (com.tuxphones.Organizer.json) and look for the "modules": line. Here we will need to add a libhandy module, built from source from Git, before our organizer module, as the latter depends on the former. You can simply copy the following just after "modules": and before other modules in the list:
{
    "name" : "libhandy",
    "buildsystem" : "meson",
    "config-opts" : [
        "-Dprofiling=false",
        "-Dintrospection=enabled",
        "-Dgtk_doc=false",
        "-Dtests=false",
        "-Dexamples=false",
        "-Dvapi=false",
        "-Dglade_catalog=disabled"
    ],
    "sources" : [
        {
            "type" : "git",
            "url" : "https://gitlab.gnome.org/GNOME/libhandy",
            "tag" : "1.0.2"
        }
    ]
},
Now open the meson.build file in the root directory and add the following line after the first project(...) lines:dependency('libhandy-1', version: '>= 1.0.0')
You should still be able to compile and run the project properly. We can now open the window.ui file from the src folder and change GtkHeaderBar to HdyHeaderBar to see if it is properly integrated. First of all, you need to include Handy in window.py in order for our app to load libhandy widgets alongside Gtk ones:
We will also need to call Handy.init() in order for libhandy and its widgets to initialize properly.,
You can now build and run the app again. If you don't see any errors in the log, congratulations, your Gtk app now has libhandy support!
Step 4: An UI stub for our ToDo app
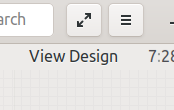
To start designing our UI, open the window.ui file in Builder and click on the (small) View Design button just below the title bar:
If Builder does not crash (sigh), you should now have Builder's UI designer (Glade) right in front of you. If libhandy is fully installed you should see the widgets from its "catalog" by clicking the three dots you see in the picture:
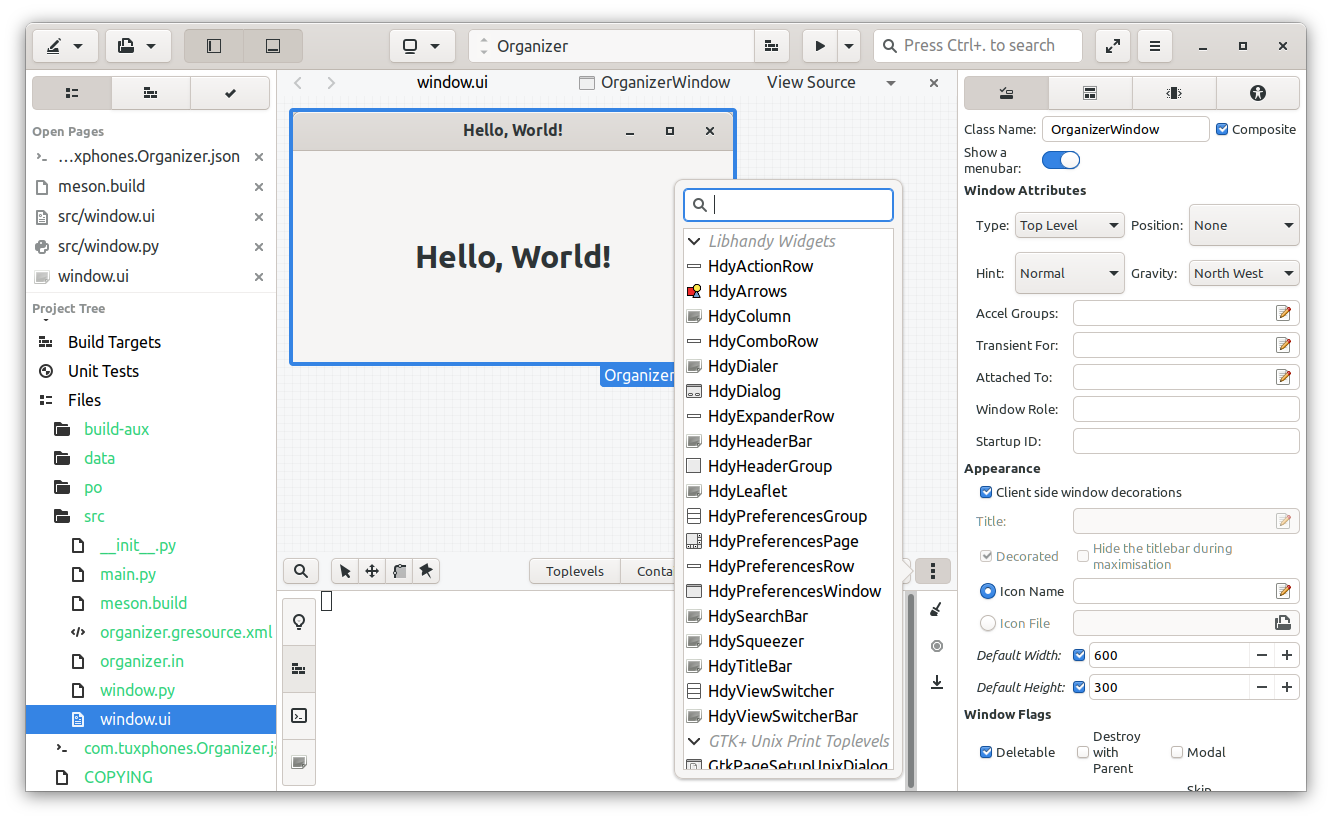
If no libhandy widgets show up, don't panic! Some distros might have set the -Dglade-catalog flag to false, which means you should first try to install all libhandy-related development packages from your distro, then compile and install it from source manually if it still does not work. You can also do without libhandy widgets and Glade (the UI editor) entirely, but that means you'll have to edit the .ui source file manually, which might be longer.
Now we can start by removing the GtkHeaderBar (by clicking on it to select it, and then pressing DEL) and label (also important, or it will not work), and add a HdyHeaderBar as title bar and GtkBox in the content area (so we set Number of Items to 2). The top part of the box will store the GtkStack, the bottom one the view switcher to be shown on mobile.
Also remember to set Show Decorations to true on the HdyHeaderBar in order for window controls to be shown on desktop devices.

Now we'll add a GtkStackSwitcher to the title bar (for "wide screens") and a mobile-oriented HdyViewSwitcherBar to the bottom of the box.
Now select the GtkBox, go to the third tab of the right sidebar and set vertical expand to true using the switch.
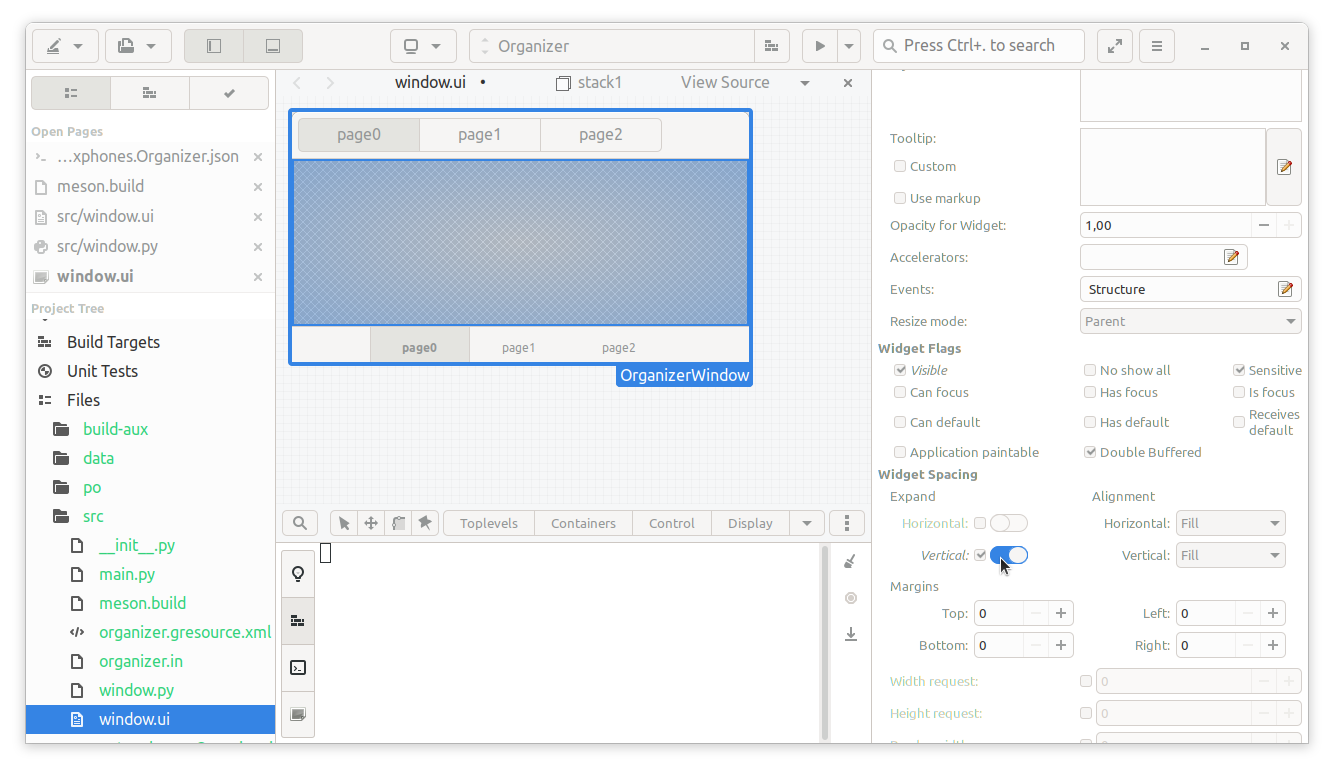
Next we'll set a stub widget (a label in our case) for the first page by dragging a label inside the GtkStack after selecting the first page from one of the two switchers we just created.
Then we give an identity to our stack page by switching to the second ("Packing") tab from the label and setting name (todo), title (To Do) and a nice icon following the Freedesktop naming (in this case view-list-symbolic).
Now we do the same with page 2 ("Done", with icon object-select-symbolic) and 3 ("Pomodoro", alarm-symbolic)
As a minor tweak to the UI, I set Icon Size to 5 in the bottom switcher to make it look (arguably) better.
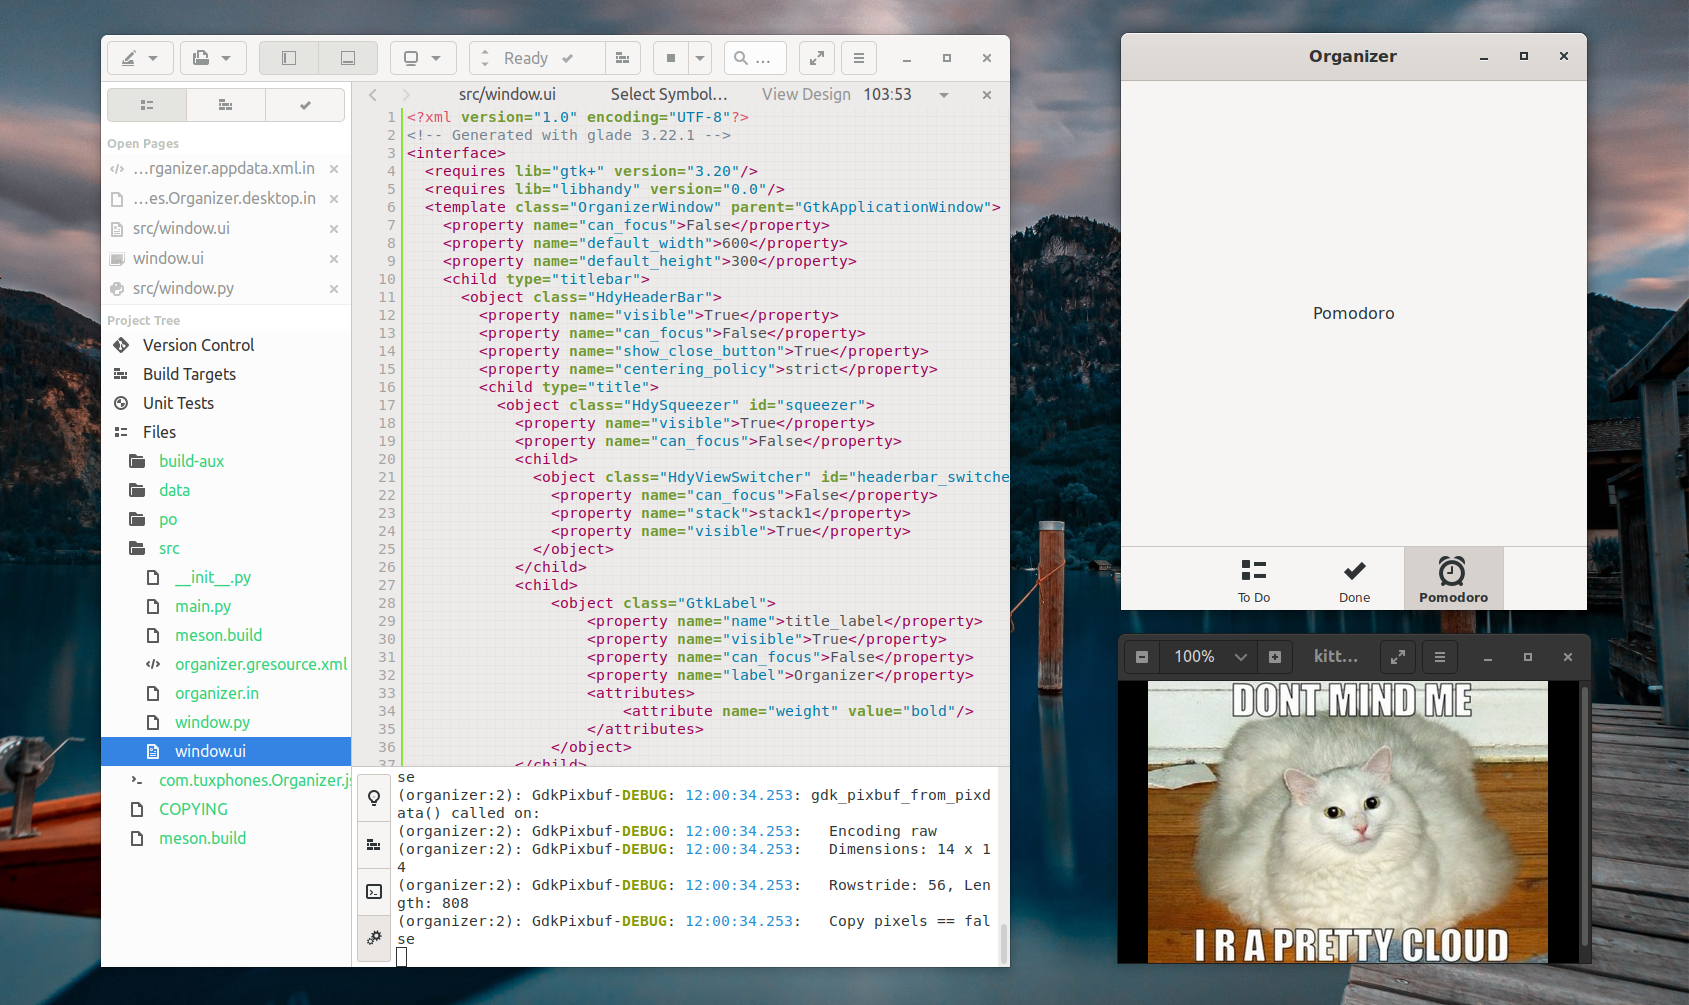
You are now ready to hit the Run button again, and see your app (stub) in all its glory.
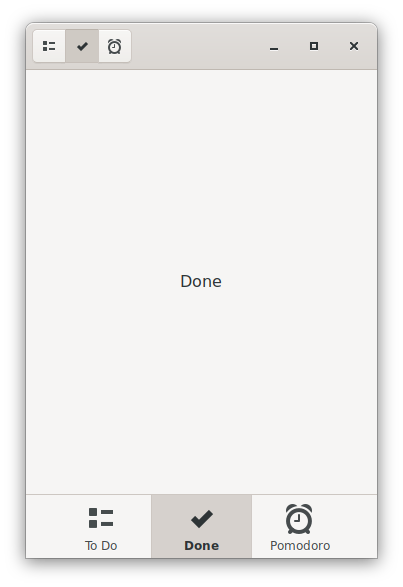
Sure, there's still a long way to go. The app is not responsive, two redundant view switchers are shown (the top one not even centered), but it's a nice libhandy app stub, and the view switching logic already works. But now how do we remove redundant switchers and make our app finally responsive? Let's find out.
Step 5: Making the view switcher responsive
First of all, we'll need to rework our UI a little in order for the header bar to become responsive. libhandy's HdySqueezer will become the first (and only) child of our HdyHeaderBar, as this widget adapts to the container with a "best-fit" logic, in this case showing the first child that fits in the current window width. If only one is present, that widget is always shown.
We temporarily delete the GtkStackSwitcher from the title bar, and instead add a HdySqueezer (with ID squeezer) as child.
Then we set the header bar title string to none, and add two widgets to our Squeezer.
The first is a HdyViewSwitcher (not -bar as above), with ID to headerbar_switcher and its Stack set to our previously created (and only) GtkStack. Remember to set it to "visible" in case it isn't by default.
Secondly we add a GtkLabel to mimick our window title. The label must be placed after the switcher in order to be shown as a fallback. As it might be tricky to add a second child to Squeezer from the UI editor, you may need to click View Source and manually insert this as second child of the HdySqueezer:
<child>
    <object class="GtkLabel">
        <property name="name">title_label</property>
        <property name="visible">True</property>
        <property name="can_focus">False</property>
        <property name="label">Organizer</property>
        <attributes>
            <attribute name="weight" value="bold"/>
        </attributes>
    </object>
</child>
Finally, we add a property to the header bar to set its centering policy...
<property name="centering_policy">strict</property>...and (very important!) modify the line just before <object class="HdySqueezer" [...] to specify that this is not only a HeaderBar child, but represents its "title"
So we change <child> to <child type="title">. This attribute is quite tricky and tends to get discarded by the UI editor even on minimal changes, so if the app looks off after some UI modifications remember to set it again from source.
Finally, select the bottom switcher from the UI editor, set its ID to bottom_switcher and disable the "Reveal" switch. Don't panic: it's not visible anymore, but still there.
We now need to implement the (simple) Python logic for dynamically revealing the bottom switcher. Inside the class, we declare three instance variables squeezer, headerbar_switcher and bottom_switcher, all pointing to Gtk.Template.Child(), a somewhat magic function that will bind, if any, the object in the UI with the same ID as the variable name.
Next in __init__ (the Python class constructor) we connect our squeezer object's notify::visible-child signal, triggered when the HdySqueezer widget changes the visible object (that is, shows or hides the view switcher):
self.squeezer.connect("notify::visible-child",self.on_headerbar_squeezer_notify)`Finally, we need to create the function that will receive the signal, which we called on_headerbar_squeezer_notify above. The function simply checks if the squeezer is showing a label (that is, the switcher is hidden) instead of the HdyViewSwitcher and shows the bottom switcher only if the one in the header bar is hidden.
def on_headerbar_squeezer_notify(self, squeezer, event):
	child = squeezer.get_visible_child()
	self.bottom_switcher.set_reveal(child != self.headerbar_switcher)
As the bottom switcher is not revealed by default, we shouldn't have duplicate (or no) switchers when initially starting the app, as if the window is below a certain size the signal will be sent and the mobile switcher will be shown.
The final OrganizerWindow class from window.py will look similar to this:
class OrganizerWindow(Gtk.ApplicationWindow):
    __gtype_name__ = 'OrganizerWindow'

    Handy.init()
    squeezer = Gtk.Template.Child()
    headerbar_switcher = Gtk.Template.Child()
    bottom_switcher = Gtk.Template.Child()

    def __init__(self, **kwargs):
        super().__init__(**kwargs)
        self.squeezer.connect("notify::visible-child",self.on_headerbar_squeezer_notify)


    def on_headerbar_squeezer_notify(self, squeezer, event):
        child = squeezer.get_visible_child()
        self.bottom_switcher.set_reveal(child != self.headerbar_switcher)
Compile and run as usual, and you'll have your first responsive "hello world" app in front of you! Resizing the window horizontally should now toggle between "mobile" and "normal" stack switchers.

Step 6: Deploying your app
Finally, we want to know how to deploy our (stub) app. Thankfully Builder makes the task of turning code into a Flatpak bundle just one button far. But first, we need to have some minimal .desktop and AppData files to represent our app in desktop launchers and app stores.
In the data folder we already find two almost ready templates, [appid].appdata.xml.in and [appid].desktop.in which we will need to make just slightly more complete.
We will modify the .desktop.in file just slightly, by capitalizing the Name field and adding a GenericName (short description) line just below:
[...]
Name=Organizer
GenericName=A responsive To-Do app and Pomodoro timer, designed for Linux phones.
[...]
Similarly, we will simply add a <name> and a <summary> field to the .appdata.xml.in file. You will need a complete, detailed AppData file in order for your app to be published and correctly shown in most Linux "software center" apps. This guide covers the topic in more detail.
<?xml version="1.0" encoding="UTF-8"?>
<component type="desktop">
  <id>com.tuxphones.Organizer.desktop</id>
  <name>Organizer</name>
  <summary>A responsive To-Do app and Pomodoro timer, designed for Linux phones.</summary>
  <metadata_license>CC0-1.0</metadata_license>
  <project_license>GPL-3.0-or-later</project_license>
  <description>
  </description>
</component>
Designing and adding an icon is beyond this tutorial, but this excellent guide by Tobias Bernard will probably help you.
Finally, as we said, we want to bundle our app into a Flatpak. Builder makes all the fuss a one-click thing. Just compile your project, click on the top bar to toggle the "build status" popover, click the blue Export Bundle button and wait some seconds. Your Flatpak bundle, com.tuxphones.Organizer.flatpak in our case, will show up within seconds in your default file manager.
We've finally come to the end of this first tutorial, with a working (but still not too useful) responsive libhandy app stub bundled as Flatpak and ready to be published on Flathub or anywhere else. If you enjoyed this guide, or at least found it useful, you can leave a tip here.
Comments ()